Review
-
Game Rating
Introduction to Blood Bowl
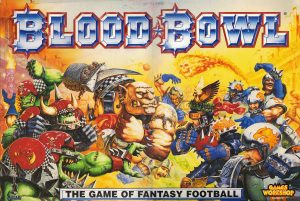 Blood Bowl is yet another popular title from tabletop colossus Games Workshop. Set in an alternate-history version of their Warhammer Fantasy universe, Blood Bowl draws a lot of inspiration, and sometimes directly riffs, characters, factions, and themes from the Warhammer universe.
The game makes many references to popular sports icons, from popular teams to famous players, so players with a passing knowledge on sports, especially American football, may find additional enjoyment from Blood Bowl (for example, one of the teams included in basic boxes is the ‘Orcland Raiders’).
Having been developed and launched 23 years ago, with the first edition hitting stores in 1986, Blood Bowl has had numerous rules revisions and updates.
Until very recently, Games Workshop maintained a “living handbook” online which served as a guide for competitive play and was frequently updated with new changes. With the launch of the 2016 version of the game, Games Workshop forewent an online living handbook and instead moved to in-box printed versions of the rules, with ancillary tutorial videos online.
The global official fan organization, “The NAF,” however, still publishes an active version of the “living handbook” which guides most competitive play. This guide will be based off of the up-to-date competitive rules compiled by “The NAF,” as these rules are what most players use to run games in stores and competitive play locations.
Blood Bowl is an intense strategic game based around ball possession, team formation, and coordinated plays. Of course, it wouldn’t be called Blood Bowl if there wasn’t plenty of combat and violence interspersed among the football-like plays.
Player characters will have many abilities that bring the game to a hybrid of a sports game and a war game, allowing players to weaken the opposition by injuring their characters. It is designed specifically for two players and uses detailed miniatures to depict teams. The newest version of Blood Bowl boasts the most impressive base figures to date, being fully painted and very detailed.
The newest base box ships with two teams — Orcs and Humans — though players interested in expanding their experience of the game can purchase a number of additional teams and figurines, including teams based around recognised creatures from the Warhammer universe.
In addition, there are a number of unpainted miniatures available for purchase which are in similar quality to Games Workshop’s other miniature games. Because of this availability, miniature painting enthusiasts and players desiring custom figures both will find plenty of options for adding a personal spin to play.

Components of Play
With a base box of Blood Bowl, interested players will be able to pick up and play immediately. However, as mentioned above, the base box limits the game to only two teams.
There are many teams available, as well as the possibility to advance to custom-teams, mixing characters from one set with another. This guide will focus primarily on play from the base box, assuming players are new to the game.
The Orc and Human teams are not identical, meaning there will be a varied play experience depending on which team is chosen by each player. Blood Bowl ships with the following team miniature loadouts:
1. Humans
a. 2 Blitzers
b. 2 Throwers
c. 2 Catchers
d. 6 Linemen
2. Orcs
a. 2 Blitzers
b. 2 Throwers
c. 2 Blockers
d. 6 Linemen
The box also comes with a number of extra ball pieces as well as bases for miniatures with ball holders to show which character is in possession of the ball at any given time. The play-field included in the newest version of the box is two-sided, depicting a home field for each team. Additionally, there are two colour coded dugouts for cards to be placed in, one for each team.
The box contains all needed dice for play, which are coloured to match the team they go with, a unique ruler and overlays for determining throw ranges and missed throw variance, and a large collection of player and play reference cards. There are also a number of optional decals which can be used as-needed to indicate player positions.
Many of these pieces warrant further description in preparation for setup of the game:
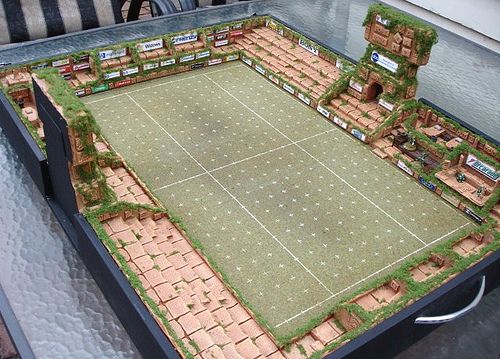
1. Pitch
a. The play-field is known as the “pitch,” and is separated into a number of zones. On either end of the pitch are either team’s end zones, which function as scoring areas. Bringing a ball into the opponent’s end zone will score a touchdown, much like in American football.
b. On the sides of the pitch are the wide zones and in the centre of the pitch is the half-way line. The area around the half-way line, but between the wide zones is known as the line of scrimmage.
2. Block Dice
a. Included in Blood Bowl’s dice mix are unique “block dice.” These six-sided dice have a number of special symbols which will be rolled when attempting to knock down characters (more details on this in the gameplay section below.)
3. Throw-in and Scatter Templates/overlays
a. Any time the ball goes out of bounds it will be thrown back in by the (imaginary) crowd. The Throw-in overlay will be used to help determine where the ball will go after an out of bounds event occurs.
b. Any time a ball is dropped or a pass to another player is unsuccessful, the Scatter overlay will be used to determine where the ball moves to.
4. Miniatures
a. Blitzers
i. These players are well-rounded staples of the team, balancing speed and strength.
b. Catchers
i. These players are incredibly fast, designed to avoid damage and catch far-flung balls. They do not do well when surrounded by opponents.
c. Throwers
i. These players are not particularly fast or strong, but they can throw the ball very far. Using throwers effectively and skillfully can win easy points for a team.
d. Linemen
i. These players are most basic foot-soldiers on any team. They aren’t particularly skilled, but they are good enough to fill space on a team if needed.
e. Runners
i. These players are the fastest of the fast. They are not as good at catching as other players, but they are excellent at moving the ball forward and avoiding being caught.
f. Blockers
i. These players are focused entirely on strength. They are large, heavily armoured, and are built to prevent forward movement. As a result, however, they are very slow.
5. Team Cards
a. Team cards are reference cards for each team which lay out the statistics of players, bonuses, and a summary of the most important rules of play. These cards detail movement, strength, agility, armor, and skills for each player on either team.
6. Roster Sheets
a. Once players have moved beyond base-box play and into custom teams, these sheets are used to detail custom team player rosters. They are not needed for games using the in-box team construction.
7. Range Ruler
a. This customised ruler helps determine how far a thrown ball will travel and helps determine possibility of interception and more.
8. Dugouts
a. Dugouts have numerous organisational uses. They can be used to track injured and reserve players, turn counts, and team re-rolls (which will be explored further in the gameplay section.)
Game Set-up
Players should decide which team they wish to play, with the official rules stating that the owner of the game gets to pick first. Once players have chosen a team, they become the “coach” of that team.
From here on out, the real-world players of the game will be referred to as “coaches” and the in game players on the team will be referred to as “players,” for clarity’s sake. Each coach should place their dugout at the edge of the pitch, near the end zone closest to them, which will become their team’s end zone.
Coaches will need to set a counter on their dugout turn track, on the “first half” space. They should also place a score counter in the score track on their end of the field.
Each coach will need to collect a number of re-roll counters matching the amount notated on their team reference card and place those counters over the re-roll squares in their dugout. Once this has been done, team assembly can begin.
A coin should be flipped or a die rolled to decide which coach will pick turn order. The coach who wins the coin flip will get to decide if they are kicking or receiving.
The kicking team gets to set up first in preparation to perform kick-off. Each coach is allowed to field up to 11 players, if a coach does not have 11 players to field, they must field as many as possible from their reserves.
Team arrangement must follow these rules:
1. The kicking team must always place their players first
2. A maximum of two players can be set in each wide zone, no more.
3. At least three players must be placed next to the halfway line, at the line of scrimmage.
a. If a team cannot set at least three players at the line of scrimmage that team must either forfeit, or (if agreed upon) continue playing with a great disadvantage.
Once player placement is complete, the coach of the kicking team is able to place the ball in any square in the opponent’s side of the pitch. Once a square has been chosen, the scatter overlay will need to be used to determine which direction the ball bounces in.
Uniquely, kick-off scatter rolls use a larger roll for determining how far the scatter flings the ball. After rolling a d8 to determine direction, the kicking coach needs to roll a d6 to determine how many squares the ball will bounce in the determined direction. This is a much larger variance than a standard scatter roll, which will be explained more in detail in the gameplay section.
The resulting position of a ball after kick-off must be on the receiving team’s half of the pitch. If the ball lands in an empty square after scatter, it will bounce one further square following normal scatter rules.
If the ball lands in a square with a player in it after scatter, that player will try to catch the ball (catching rules below in the gameplay section.) If the ball goes off the pitch or into the kicking team’s half of the pitch, the receiving coach gets a “touchback” and is able to give the ball to any player on their team.
Once kick-off is complete, the game can begin.
Gameplay
Blood Bowl is broken into two halves, each consisting of eight turns per team, with a very simple progression. The receiving team goes first, followed by the kicking team in a cycle that continues until the end of a “drive.” A “drive” is ended by a successful touchdown by either team or by the ending of a half due to turn limit being reached.
During each turn, coaches are able to have each player perform one action, and coaches are limited to a maximum of four minutes per turn, so it is advised that coaches keep a time-keeping method on hand to prevent the game from stalling for too long. Additionally, coaches are responsible for denoting the beginning of their turn by moving their turn counter one space before any actions are taken. If this action is not performed by the coach, the opposing coach can declare an “illegal procedure”.
An illegal procedure is punished by the offending coach skipping their turn, or discarding one of their re-roll tokens. If a coach incorrectly calls an illegal procedure, that coach must lose a re-roll token (if that coach is out of re-rolls, the wrongfully accused player gains a bonus re-roll.)
During a team’s turn, there are a number of possible actions each player can take. Once again, players can only take one of these actions per turn. Coaches are responsible for announcing actions a player is going to take before that action is processed. In addition, players cannot simultaneously take actions. The actions are done in order of activation. Possible actions are outlined below:
1. Move
a. This action allows a player to move a number of squares equal to their “movement allowance” (MA) which can be found on the team reference card.
2. Block
a. This action allows a player to attempt to block an adjacent player. This action is not able to be performed by prone players.
3. Blitz
a. Important: Only one player per turn may declare this action
b. This is a combination move that allows a player to both move and block one opposing player somewhere adjacent to the line of movement. The action of blocking reduces the player’s MA by one point.
4. Pass
a. Important: Only one player per turn may declare this action
b. This is a combination move that allows a player to move and then attempt to pass the ball to another player.
In general, a turn will end when all players have taken their action. However, certain special conditions can cause a turn to end early. These events, known as “turnovers” are outlined below:
1. A player on the active team is “knocked down”. Injuries from the crowd and becoming prone do not count as being “knocked down.” Knock downs usually occur from blocking, and require rolls from both players. Knock downs can result in injuries and even death to a player. Knock down rules are explained in the blocking section below.
2. The active team fails to catch a ball that has been passed before it comes to rest on the ground.
3. A player on the active team fails to pick up the ball.
a. Note: failing to catch a ball that has been passed isn’t a turnover in and of itself, but can lead to a turnover if the ball is unable to be recovered.
4. The active team scores a touchdown.
5. The active time runs over its four-minute limit.
6. A fumble occurs on a pass (even if the ball is recovered immediately afterwards, the turnover still occurs.)
7. An active player in possession of the ball is thrown by the special ability “Throw Team-Mate” and fails to stick the landing.
8. A player is ejected for a foul.
Turnovers mean that the current turn ends immediately for the active coach. Even incomplete actions stop immediately. Any knocked down players need to make armor and injury rolls as usual, and if the ball was dropped, roll and scatter needs to be determined. Once these are determined, the defending coach can then begin their turn.
Now that the basic turn order and rules have been established, further detail on specific actions is warranted.
Movement:
As stated above, movement is based off of the movement allowance or MA of the player currently taking the action. Movement can be taken in any direction including diagonals; however, players cannot cross through the squares of other players.
Opposing players that are not currently moving, prone, or stunned control an area around themselves known as a “tackle zone.” This area is comprised of every adjacent square to the square the player currently inhabits.
Active players attempting to move through a tackle zone must make a “dodge” roll in order to leave the tackle zone. Dodges must be done upon leaving any tackle zone, regardless of whether the player is moving into another tackle zone or not. Overlapping tackle zones of opposing players add difficulty to dodges.
In order to calculate a dodge, the coach should reference the active player’s agility score on the team reference sheet. A higher score means an easier dodge.
Dodging is calculated by rolling a die, adding or subtracting modifiers, and then referencing the player’s agility score. Rolling a 1 is always a failed dodge, and rolling a 6 is always a successful dodge, regardless of scores or modifiers. This basic table may assist:
1. AG of 1 = 6 or more modified roll to succeed
2. AG of 2 = 5+
3. AG of 3 = 4+
4. AG of 4 = 3+
5. AG of 5 = 2+
6. AG of 6 = 1+
When dodging, the active player always receives a base bonus of +1 for dodging and -1 for being in a tackle zone. Each additional tackle zone overlapping on the square attempting to be dodged out of will add an additional -1 modifier to the roll.
So, for example, a player with an AG of 3 attempting to leave a double-overlapped tackle zone would need to roll a 5 or more in order to successfully dodge.
A failed dodge results in a knock down, which immediately ends the turn for the active team and results in the coach having to roll for injuries.
In addition to entering tackle zones, the AG score will be used for when a player enters the same square as the ball. If a player enters a square containing the ball during normal, that player must try to pick it up.
A player does not attempt a pick up of the ball when forced movement such as pushes or throws occurs.
Much like with dodging, picking up the ball uses a roll, modifiers, and AG score to calculate a result. Rolling a 1 is always a failed pick up, and rolling a 6 is always a successful pick up.
This is true for any agility based roll in the entire game. The chart for agility calculations is almost exactly the same. Players always receive a base +1 bonus for attempting to pick up the ball, and a -1 for each opposing tackle zone overlaying the square they are acting in.
Blocking:
Another possible player action is the block. Blocking can only be performed on adjacent players who are currently standing. Players who are prone or knocked down are not valid for blocks!
Blitzing combines the rules of movement with a block action. Movement can continue after a block, if the player has enough points of movement left after performing the block.
Blocks are calculated by comparing the strength statistic of the attacking player versus that of the defending player, and then rolling the unique block dice based off of this comparison.
The following rules should be followed in comparing strengths:
1. Players having equal strength results in the attacker rolling one block die and accepting the result
2. If one player is stronger than the other one, two block dice are rolled and the stronger player gets to choose which result will conclude the action
3. If one player is more than twice as strong as the other player, three block dice are rolled and the stronger player gets to choose which result will conclude the action
The following results are possibilities on the block dice:
1. Skull Symbol
a. Attacker Down: The attacking player is knocked down, which triggers a turnover immediately.
2. Skull and Starburst Symbol
a. Both Down: Both players are knocked down unless one or both of the players has the special “Block” skill on their character reference square. Any player that uses the block skill will not go down.
b. This result can result in numerous outcomes because of the involvement of block skills.
3. Arrow Symbol
a. Pushed: The defending player is pushed backwards one square and the attacking player is allowed to “follow up” on this action, meaning they can step forward into the now-vacated space for free, ignoring tackle zones.
4. Starburst with Exclamation Mark Symbol
a. Defender Stumbles: The defender is knocked down unless they possess the “dodge” skill on their character reference square. If the defender uses this skill, they are only pushed back. Pushing back a defender here allows for follow up.
5. Starburst Symbol
a. Defender Down: The defending player is pushed back and then knocked down. The attacking player can follow up after this action. This is the most optimal roll for the attacker.
In the case of push backs, the coach of the player making the block action (the attacker) is allowed to decide which square the player is pushed into. Players being pushed move one square backwards away from the attacking player.
They can be pushed into other players, onto the ball, and off the pitch, however, if an empty square is available, the player must be pushed into that square. A square containing the ball is still considered empty, though the player will displace the ball by being shoved into that square. Each situation mentioned above has a different result, outlined below:
1. Pushed into Another Player
a. Pushing a player into another player creates a chain reaction in which the second player is also pushed, following the same rules as the primary push back.
2. Pushed into the Ball
a. Pushing a player into a square with the ball triggers the ball to bounce, the process of which is outlined below.
3. Pushing a Player off the Pitch
a. If a player is pushed off the pitch, they immediately are beaten up by the crowd and receive an injury by rolling on the injury table (this process is explained below). If the player would have been knocked down after this push, they still only receive an injury from the crowd, not the crowd and the attacking player.
b. No armour rolls are made for players pushed off the pitch.
c. If the player pushed off the pitch is holding the ball, the crowd takes the ball and performs a throw-in, using the throw-in template.
Any player who is knocked down during a block becomes vulnerable to injuries!
Knock downs, Injuries, and Substitutes:
Any time a player is knocked down, they are subject to an injury roll. There are a series of dice rolls that will be made when a player has been knocked down. The attacking player’s coach should roll two d6.
If the total of those two d6 overcomes the Armour Value (AV) of the downed player, the attacking coach is able to roll an additional 2d6 in order to get a result from the injury table. These are the possible outcomes:
1. 2-7 value rolled results in the downed player being stunned. A stunned player’s figurine is turned face down and does not threaten with a tackle zone until their team’s next turn, when they are no longer stunned and may stand up following the rules for standing listed below.
2. 8-9 value rolled results in the downed player being knocked out. A knocked out player should be removed from the pitch and placed in the “KO’d” section of the dugout. At the beginning of the next kick-off, coaches must roll a d6 for each KO’d player. Any roll less than 4 results in the player remaining KO’d until the next kick-off. Any roll of 4 or above means the player can be returned to the reserves section of the dugout and used regularly.
3. 10-12 value rolled results in a casualty! This player should be removed from the pitch and placed in the “dead and injured” section of the dugout. The player misses the rest of the match.
A stunned player can only stand up at the beginning of an action, and it costs three squares of MA. If the player’s MA is less than 3, the coach needs to roll a d6 and score higher than 4. On a roll, like this the player may not move more after standing. A player who fails to stand back up is not considered a new knock down, and therefore will not trigger a turnover.
Whenever a touchdown has been scored, half-time setup begins, or overtime setup begins, substitutes can be brought in from the reserve. Injured players cannot be subbed out during a drive, only when setup is occurring again.
Throwing the Ball:
While a pass action includes movement, movement terminates with the throwing of the ball. A player cannot keep moving after performing the actual pass.
Passes are, like dodges and pick ups, based on agility scores.
Catching also uses agility scores. A coach must use the included range ruler to determine if the desired player is within range.
Passing and catching calculations have a lot more modifiers than dodging and pick ups, and they depend on a lot more variables. The base agility rolls however, are the same (an agility of 1 requires a modified 6 or more, etc.) For passing and catching, the following modifiers should be taken into calculation:
1. Passing
a. Throwing a Quick Pass = +1
b. Throwing a Short Pass = +0
c. Throwing a Long Pass = -1
d. Throwing a Long Bomb = -2
e. Each Enemy Tackle Zone On the Passing Player = -1 per zone
2. Catching
a. Catching an Accurate Pass = +1
b. Catching a Scattered Pass, Bouncing Ball, or Throw-in = +0
c. Each Enemy Tackle Zone on the Catching Player = -1 per zone
If a passing player fails to make the necessary roll, the pass is considered inaccurate and will scatter. When scattering for a pass, three scatter dice will be rolled, moving the ball one square in the direction the die determines each time and then re-centering the scatter template.
This means that the ball can end up scattering back where it was supposed to land in the first place! While the ball is scattering, players cannot attempt to receive it. They can only receive it at its final resting square.
If the ball does manage to land in a square inhabited by a valid player (not stunned, not knocked down), then that player must attempt to catch the ball regardless of which team they are on.
If the player succeeds at rolling to catch, they are able to continue their action as normal if they have not yet acted. If they fail, however, they drop the ball and it bounces.
Bouncing, Throw-ins, and Resulting Turnovers:
The ball will bounce when fumbled, when knocked aside by a pushed player, or when it lands in a square with a stunned or prone player.
When bouncing, the scatter template should be used and a d8 should be rolled as usual to determine the direction. If it lands in an empty square, it comes to rest and can trigger a turnover.
If it lands in an occupied square, that player must attempt to catch it if possible. If they are prone or fail to catch the ball, it bounces again until it either bounces out of bounds, into an empty square, or is finally caught.
If the ball bounces off the pitch, or is dropped by a player pushed off the pitch and subsequently injured, this will trigger a throw-in.
The throw-in template should be used to determine where the ball will end up after the spectators throw it back into play. The template will guide the direction, and throw-ins always have a significant distance. When processing a throw-in, 2d6 should be rolled to determine the distance.
As always, if the ball lands in a square with a standing player, that player must try to catch the ball. Thrown-in balls follow the usual bounce rules as well.
Turnovers can result from both bounces and throw-ins. If the ball comes to rest without being caught by a member of the acting team, this triggers a turnover immediately.
Re-rolls:
There are two types of re-rolls in Blood Bowl: Team Re-rolls and Player Re-rolls. Team re-rolls are determined by the team reference card, and are refreshed only at the beginning of the game and at halftime. Player re-rolls are based on special skills certain players may have.
Team re-rolls can be used to re-roll any dice roll except for an armor, casualty, or injury roll during that teams turn. Re-rolls completely override the first roll, even if the resulting roll is a worse value. Only one team re-roll may be used per turn, and only the static number of re-rolls can be used in each half of the game.
Player re-rolls are more complicated, but also more flexible. These re-rolls are based off of specific skills and can be used an infinite number of times in a single match or turn.
However, on any single roll, only one re-roll may be used. A coach cannot have his player re-roll the same challenge over and over. Player re-rolls are based off the following skills:
1. Block
a. When used, allows a player to resist being knocked down by certain results of the dice.
2. Catch
a. This skill allows a player to re-roll failed catch rolls.
3. Dodge
a. This skill allows a player to re-roll a failed dodge out of a tackle zone. This is the only re-roll that cannot be doubled down on, meaning a player can only re-roll for one dodge during their movement.
4. Pass
a. This skill allows for the passing player to re-roll on an inaccurate, failed pass check.
5. Sure Hands
a. This skill allows for re-rolling the die when attempting to pick up a ball.
Victory
The game ends when both halves of the game have been played (16 turns by each player, split in to segments of 8 turns.)
Whichever team has the most touchdowns at the end of the last turn of the game is the winner. If the teams are tied for score, the players can either agree to draw the game, or to progress into “sudden death overtime”.
Overtime is a full additional “half” of 8 more turns per team. However, during overtime re-rolls are not replenished. Only leftover re-rolls from the second half of the game cary over. If a team scores during overtime, the overtime ends early and that team is the immediate victor.
Touchdowns are quite straightforward: if a player has the ball while standing in their End Zone, they score a touchdown.
A knocked down player cannot score in the end zone, however, a score can result from forced movement. If a player is pushed into their own End Zone while in possession of the ball, this will result in a touchdown – even if it takes place during their opponents turn!