Review
-
Game Rating
Introduction to Dungeon Petz
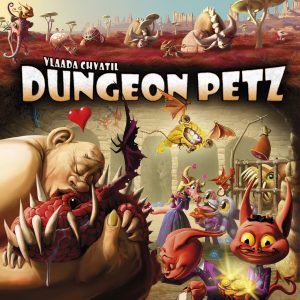 Dungeon Petz is a light-hearted strategy game based around the care and raising of baby monsters. It is set in the universe of the Dungeon Lords series, and the players are tasked with raising monsters to be shown off to and ultimately sold to the Dungeon Lords.
While Dungeon Petz is set in the same universe as Dungeon Lords, the former is much more comical and family-oriented. Dungeon Petz is a standalone game that does not require any knowledge of Dungeon Lords nor any pieces or sets from the precursor games.
Dungeon Petz was designed by Vlaada Chvátil and published in 2011 by Czech Games Edition, now more widely known for the popular spy-game hit Codenames. It inspired a booster set of additional pets and then a full expansion in 2013 known as Dungeon Petz: Dark Alleys.
Dungeon Petz is suitable for family play, and offers simple-to-learn gameplay with plenty of room for challenge to keep young players and older players both interested.
In Dungeon Petz, players will take control of families of imps running monster pet shops and attempting to entice buyers into their stores. The fusion of light economic play with animal care and pet contests hearkens to the mid-90s wave of pet care toys and games like Tamagotchi, Furby, and Giga Pets, in which the pets often seemed to have a mind of their own.
In Dungeon Petz, the pets will certainly not always do what they are told immediately, and part of the fun and the challenge is learning how to handle misbehaving, rambunctious monsters! Interested players will be greeted with colourful, silly, and cute art from the box inwards.
This guide will focus on the basic game, and will touch lightly on some of the offerings of the Dark Alleys expansion.
Number of Players, Playtime, and Components
Dungeon Petz is designed to be played with 2-4 players, though the basic rulebook suggests 4 players for an optimal experience. This guide will assume a game of four players. Playtime of the game tends to run about 90 minutes per game, though particularly competitive matches might take longer.
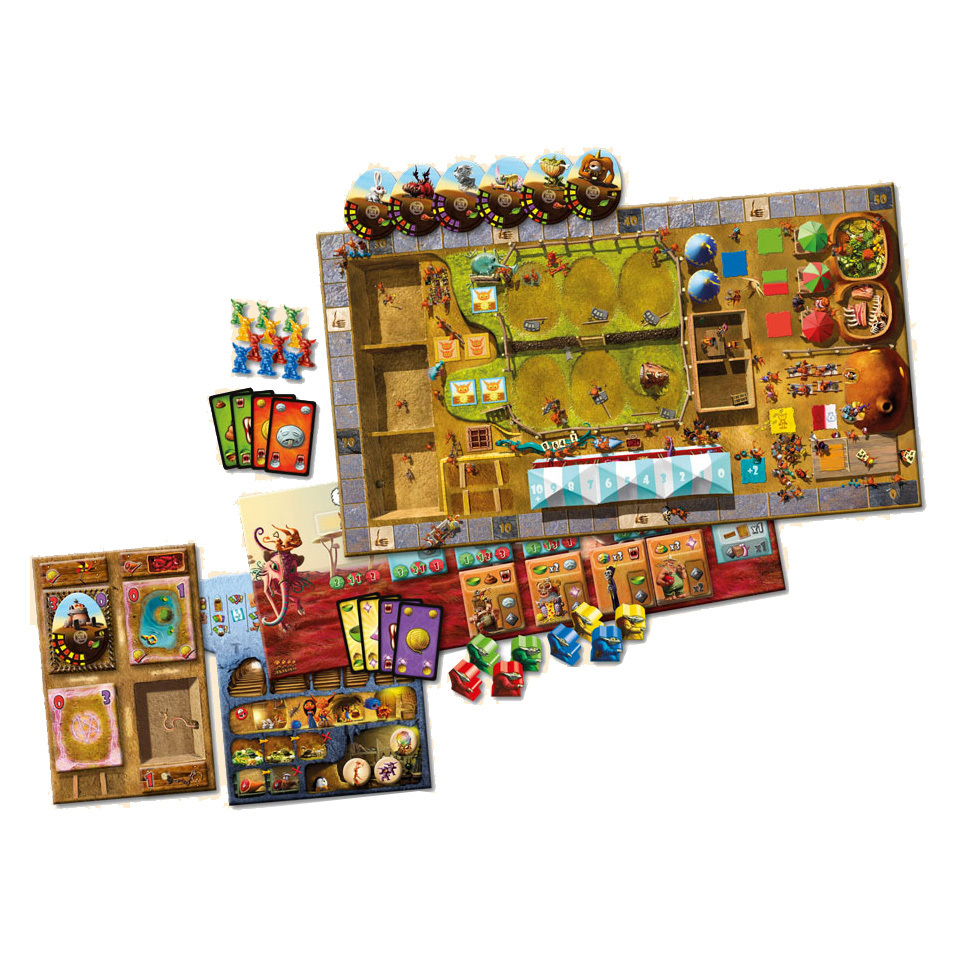
The base box of Dungeon Petz includes all needed pieces, which warrant some description here as there is a decent number of unique pieces. The first major pieces in the base box are the player boards, progress board, and the “central board”.
The player boards serve as an organisational space for each players imps, minions, achievements, and “burrow,” which is the living space of each player’s imp family. The burrow board also serves as a convenient reference card for various important values.
The burrow boards are detailed with imp exits (a limited number of imps can be dispatched at a time,) food storage, artifact storage, sleeping quarters, and a personal bank. Additionally, the burrow boards have a second rectangular segment depicting space for new cages and cage upgrades.
The progress board should be maintained by one player, but all players need to be able to see it. The progress board is two-sided, one side for use with 2-3 players, and one side for use with 4. Four player games have slightly less rounds, but may run longer depending on competition and individual turn time.
The progress board helps all players be aware of the number of rounds that have passed, but also represents a number of other portions of game progression. On the progress board, players will place extra imps, representing distant family members travelling to become a part of the family business.
In addition, the “dates” of exhibitions and customers’ arrival is tracked on this board. As the turn progress marker moves to each row of the progress board, extra imps will be distributed and customers will pour into town to see the exhibitions.
The central board is another two-sided piece which has a side for 2-3 players and a side for four players. This board serves as the main play area, depicting the town all the imp families live in and operate their pet shops in.
There are 14 “action spaces” on the central board which represent tasks for imps to undertake during the game. Both young and older pets will also appear on the central board, as well as pet cages and pet cage upgrades. In addition, artefact shops, food shops, the hospital, the bank, and minions will all appear on the central board.
Tokens for manure, suffering, mutation, additional pets, and cages should be stacked around the central board. In addition, four colour-coded need decks representing the dynamic needs of various pets will be a major facet of the central board.
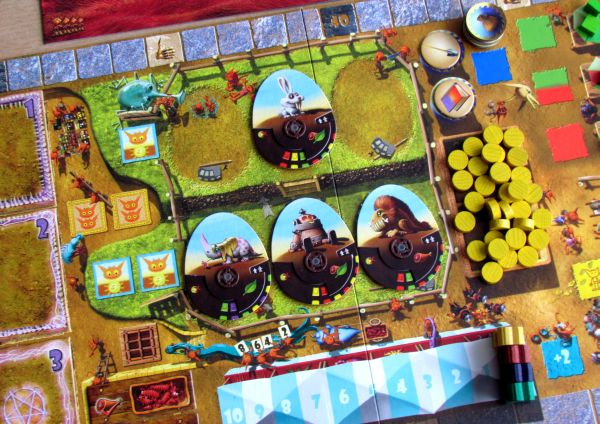
Many of the pieces in the box are printed on cardboard sheets and should be popped-out before setting up for the first play. There are 18 cardboard pets which have 3 parts, an egg-shaped portrait, a wheel with detailed pet information, and a plastic fastener which attaches the egg piece on top of the wheel.
There is a small set of windows on the portrait piece which allows for the wheel beneath to be rotated during gameplay, changing the status of the pet.
Also in the box are a number of exhibition tiles, customer tiles, and colour-coded imp figurines for each player to use.
Setup
After all cardboard tokens have been punched out, the central board should be setup first. Food tokens should be sorted into green vegetable and red fruit stacks, and then placed onto the green and red food storage areas on the central board.
2 vegetables should be drawn from the storage area and placed on the green food market icon, 1 vegetable and 1 meat should be placed on the red-and-green market icon, and 2 meat should be placed on the red market icon.
Artefact tokens should be turned face-down and shuffled, then piled next to the central board.
Before play, draw two artefacts and place them on top of the two blue artefact shop tents. All the gold should be placed in the bank icon, and then two gold token should be handed out to each player and placed into their burrow. Suffering tokens, manure tokens, and mutation tokens should all be placed in individual stacks next to the central board.
In addition, need decks, separated by colour and individually shuffled should be placed in a place accessible to all players. Discard piles should be maintained separately as they will be reshuffled if a deck runs out.
Each team should place one of their coloured minion tokens on the “0” space of the scoring track, and the other minion token in the “0” space of the exhibition tent. The five potion cards should be placed on a stack over the hospital space.
On the left side of the board, the cages should be placed face down in a stack next to the board and shuffled. The upgrades or add-ons should be handled similarly.
Once shuffled, three cages should be drawn and placed over the cage option squares on the central board. Two add-ons should be drawn and placed over the add-on option squares. All pet tokens should be mixed up and placed face down. First, draw three pets and set their wheels to reveal only the first two coloured bars. These represent younger pets of size 2.
A fourth pet should be drawn and placed above the other three. This pet’s wheel should be set to reveal three bars. This represents an older pet of size 3.
After the central board has been set up, the progress board should be completed. The purple progress marker should be placed on the space labeled “1.” Each player on the team should then place one of their colour coded imps in the squares below each round number, except the turn five square and the end-of-game square.
All eight exhibition tiles should be shuffled, then dealt out to each of the four round-based exhibition spaces. None of the discarded exhibitions should be revealed. When all the exhibitions have been dealt, the first exhibition tile should be flipped face up (located in the round 2 column).
Exhibitions depict scoring rules for that round’s exhibition, and also reveals what food will go on sale that round by depicting coloured numbers which correlate to the shop icons on the central board. Below the exhibition tiles lie the customer tiles.
The customers arrive in town starting on round three and should be treated similarly to the exhibition tiles, shuffling all eight, drawing four and placing them on the board. Only the first customer tile should be revealed.
Finally, the player boards and hands should be set up. Players should draw four need cards, one of each colour. Each player may look at these cards, but should keep them secret from other players. Players should take 6 imps of whichever colour they chose at the beginning of setup.
They should also take an achievement token to be placed next to their burrow. The achievement token is a bonus that can be put on the scoring track if a player’s minion counts up more than 50 points during play. If 100 or more points are scored, that player can turn the achievement tile over to the “ultimate achievement” side.
Next to the burrow board, players should place their cage board. One manure token should be placed in the free “initial cage” square. The initial square has two numbers in the top corners, a red “1” and a purple “1.”
This means the cage’s parameters are 2. The red 1 indicates a strength of 1, and the purple one indicates an antimagic property of 1. There are four total cage plots, and each cage including the initial cage has room for a single add-on or upgrade.
Once all of these have been setup, play can begin.
Gameplay
Rounds are broken down into six phases: Setup, Shopping, Need Cards, Showing Off, Business, and Aging. The setup phase is different for the first round and has been explained above in the setup section. In this section, each phase will be explained as it is usually performed after the first round. For the first round, simply substitute the setup above for the standard setup phase.
1. Setup:
The setup phase of all rounds after the first has three major sub-steps. Revealing new information, adding new stuff, and getting income. In the first round, all of this was handled by the initial game setup except for gathering income.
To gather income, the first two players in rotation get one gold, and the last two players get two gold from the bank. This happens at the beginning of each round, even the first. After gathering income, the adding stuff and revealing new information phases can occur.
Revealing information is simple, at the beginning of the round turn up the next unrevealed exhibition and the next customer. It should work out that at every round the players know this turn’s exhibition and the next turn’s, as well as this turns customer and the next two turns’ customers.
The next step in round setup is to add new stuff. Food should be placed in the food stands according to the information on that round’s exhibition tile. Leftover food from the previous round is discarded and replaced. Left over artifacts should similarly be discarded, and two new artefacts drawn.
As for cages, only the bottom cage of the three should remain. The bottom cage should be slid up to the top spot and the rest discarded. Similarly, one add-on remains, and one add-on is discarded and replaced by a new one.
New pet addition is a little bit more complicated. First, all older pets should be discarded. For each older pet discarded, add one meat token to the meat stand (grim, yes.) After all older pets have been discarded, all younger pets grow up to older pets and new younger pets are drawn from the pet pile.
This concludes the setup phase.
2. Shopping:
In this phase, players will group imps into errand teams which can be equipped with gold. Larger groups of imps will have a higher chance of getting good things, and groups with gold will have an even better chance.
At the beginning of this phase, all players should raise the top portion of their burrow board so that other players cannot see their strategising.
Players should divide their imps and gold into at most 6 groups (demarcated by the tunnels on the burrow board.) Not all imps need to be assigned, but it is advised to do so since groups can still be held back before sending them into town. Once all players have made their groups, they should put the top of the burrow board down and reveal their groups.
Groups are sent shopping by size. The biggest group should be determined by adding up all the imps and gold tokens in a single tunnel square.
The biggest group out of all players’ groups goes first. If groups are tied, whoever is holding the starting player token goes first and then the tied groups go out in clockwise order. If a player has multiple groups tied for size within their own burrow, they can only send one at a time, but might get to go first twice.
After every player tied for group size has gone first, play moves to the next highest group size, and so on.
When sending a group, a group can stay at home or can go to buy something. If a player chooses to buy something with a group of imps, put all of the imps in that group into one of the action spaces for whichever shop the imps have been sent too. Any gold sent with the imps is put into the bank.
The imps occupy that space until the end of the round, preventing other players from getting access to the same wares (some shops have more than one space.)
Each action space on the central board has some different rules, which are outlined below:
1. Market Spaces
a. Market spaces are comprised of food vendors and artefact vendors. When a group of imps takes up a vendor action space, they get everything attached to that space. So, for example, an imp group visiting the artefact space would get both of the artefacts from the artefact vendor, while an imp group visiting the vegetable vendor would get all the vegetable tokens. Imps bringing home artefacts trigger their effects, which are listed by type in the player handbook.
2. Pet Corral Spaces
a. Spaces in the pet corral are spaces for cages, pets, and add-ons. Each has their own special rules, though all of them follow the rule that a group of imps allows the player to pick one item out of the item offer, not all of the items like in the market.
i. Cages
1. First off, a group must have at least two imps present in order to visit the cage vendor.
2. When visiting the cage vendor, the first visitor gets to pick one of the three cages. The cage vendor has two action spaces, so a second visitor can come and pick from the remaining two cages.
3. If a new cage replaces an old cage, all contents are transferred to the new cage, including manure.
ii. Add-ons
1. There is only one action space for add-ons, meaning only one of the two add-ons may be selected each round.
2. Add-ons and cages cannot be changed once they are connected. Choose wisely!
iii. Pets
1. There are three action spaces for pets: two for younger pets and one for older pets. Groups visiting the pet action spaces are allowed to choose any pet they would like of the pets still in the corral, in the order of arrival of the group.
2. Imp groups can only visit the corral if they were sent with gold!
3. Pets can be purchased without a cage for them to go in, but they will be unable to be used until they have a cage to go in!
b. Hospital Area Action Spaces
i. In the area of the hospital, there are a number of unique action spaces. These action spaces are the Imp Immigration space, the Hospital space, the Judging space, and the Platform Booking space.
1. Imp Immigration
a. At the beginning of the game, each player put a number of imps on their progress board. If a group of imps is sent to the Imp Immigration space, all of a player’s imps from this round’s progress column, as well as previous, uncollected rounds’ progress columns will join them and return home at the end of the phase.
2. The Hospital
a. If a group of imps is sent to the hospital, they are able to accomplish two tasks with their visit. First, all injured imps rejoin the group and will return home at the end of the phase. Secondly, the player is able to draw a potion card into their hand.
3. The Judging Space
a. Sending imps to this space allows them to volunteer to be a judge for the next exhibition. Volunteering as a judge gives an advantage to that player. If a group of imps is sent here, they can move their minion figure on the exhibition tent icon forward to the space marked 2.
b. Because round one does not have an exhibition, imps should not be sent here in round one.
4. Platform Booking Space
a. Pets can be sold from any place, but receive many bonuses when being sold from the “platform.” Sending imps to the platform allows them to stay on the platform for multiple rounds. Imps sent to the platform do not return home until a player has sold a pet, even then, only one imp returns home for each pet sold. This means many imps can crowd the platform over the course of multiple rounds.
Once actions are resolved, the next phase can begin.
3. Need Cards:
In this phase, three major actions are taken in order:
1. Arrange cages and pets
2. Draw Need Cards
3. Assign Need Cards
All players are able to play this phase simultaneously, though players are allowed to wait to see what other players do first if they so wish. Each round all pets must be assigned a cage, and all cages purchased in the shopping phase must be placed.
If a pet moves to a different cage, all mutation and suffering tokens move with it, though manure tokens stay in the cage they were created in. Pets need their own cage, so no cage sharing is allowed.
At the end of this phase, if a player has a pet that does not have a cage, it must be released, and might count against that player in score calculation.
Once all cages and pets have been organised, the drawing of need cards can be processed. A player is required to draw need cards based off the revealed colour bars on the bottom of each of their pets.
For example, if a younger pet has two yellow bars revealed, two yellow need cards will be drawn by the player that owns that pet.
Finally, the most complex step of this phase is applying need cards to individual pets. Pets must be assigned one need card for each colour bar and the need cards must match the colour of the bar shown.
On the face side of every need card is a symbol, these symbols are the most important part and must be considered when assigning need cards to pets.
The frequency of various need types in each colour deck is outlined on the burrow reference section. Players must be careful in assigning types of needs because if those needs are not met, there will be consequences. Potions gathered from the hospital are unique in that they can substitute in for a need of any colour, serving as a safe wild-card.
After needs have been assigned, phase four begins.
4. Showing Off
In the showing off phase, needs are settled and consequences of unfulfilled needs are dealt. The details of how to fulfil each need, and its consequences if ignored, are as follows:
1. Hunger
a. To fulfil a hunger need, a pet must be given a food token for each hunger need. Pets only eat food types depicted on their pet token, so be sure to keep an eye on whether you will need vegetables or meat going into this phase.
b. For every unfulfilled hunger need, a suffering token must be placed on the pet. Suffering tokens stick with pets for the entire game and will reduce the value of the pet. Suffering tokens can also kill a pet!
c. Certain cages provide innate food which can satisfy a single hunger need.
2. Poop
a. Pets take care of this need autonomously, however, their fulfilling of this need has consequences for their living environment. For each poop need assigned to a pet, add one manure token to their cage.
b. Some cages can absorb manure, reducing the consequences of poop needs.
3. Play
a. Play demands the attention of an imp. In order to satisfy each play need, one imp from the burrow must be assigned to a pet, else that pet gain a suffering token.
b. Imps are able to entertain two different pets at once, however, they cannot fulfil more than one play need on a single pet.
c. Imps which were sent to town cannot do this task, so pets with play needs will take away from the total number of imps sent to town!
d. Certain cages have additions that automatically fulfil play needs.
4. Anger
a. Anger cannot be “fulfilled,” it simply needs to be contained and waited out. Anger needs should be added up and compared to the cage strength of any pet’s cage.
b. If a pet’s anger overcomes the strength of the cage, the pet will attempt to escape. To prevent an escape, a player will need to have extra imps left in the burrow, and one imp will be required for every exceeding anger need over those handled by the cage. Imps used to restrain an escaping pet must be moved to the hospital.
c. If there are not enough imps to restrain an escaping pet, the pet escapes and is lost.
5. Magic
a. Some pets emanate magic. Like anger, this need is settled by cage antimagic. If a pets magic needs outweigh its cage’s antimagic properties, the pet will gain a mutation token for each need beyond the antimagic property of the cage.
b. If a pet gains 2 mutation tokens, it disappears into another dimension and is lost.
6. Disease
a. Note: Poop needs must be calculated before disease needs!
b. Disease needs consider the amount of manure in a cage. Manure has no effect on a pet unless it has been assigned a disease need. If there is at least one disease need assigned to a pet, the number of disease needs should be added to the number of manure tokens in the cage. If the total number of disease needs plus manure tokens adds up to more than two, the pet will receive one suffering token plus an additional token for each point above two. A pet with 3 total points of disease would receive two suffering tokens, one for falling ill in the first place, and one for exceeding the limit of 2 by one point.
7. Potions
a. Potions are wildcards, but have a specific rule. One card of the color replaced by the potion must be discarded at the end of the showing off phase.
In any round with an exhibition token in the progress column, after processing needs, the exhibition should be scored.
Exhibitions have a number of symbols on them which help determine what will be considered for exhibition. If an exhibition has a single square icon in the top left, it is a single pet exhibit, while a four-square icon indicates a full-display exhibit.
In the top right corner of each exhibit token will be displayed the icon of which needs add points to a pet, and below that which needs remove points from a pet. In a single pet exhibit, the player may choose which pet they wish to be scored, while in a full-display exhibit all pets scores are added up.
Note: if an exhibition measures manure, even empty cages must be considered for manure contents!
When tallying the results of an exhibition, players should move their color-coded minion forward on the exhibition track for each point they gain. The final scoring follows these rules:
1. 1st place player receives 8 reputation
2. 2nd place player receives 6 reputation
3. 3rd place player receives 4 reputation
4. Last place player receives 2 reputation
There are some special circumstance rules to be considered in the resolving of an exhibition. If players are tied for a position, they all receive the reputation points minus one for each player tied with them.
So if all four players were tied for a position, the reputation reward would be 8 minus 3. Also to be considered is that players who receive 0 points for any reason do not get any reputation reward at all.
The last part of the showing off phase is considering the loss of pets. Pets can be lost in a number of ways outlined above, but as a refresher, pets can be lost by mutation, suffering, escape, or lack of a cage.
At the end of the showing off phase, players lose one point for every ten reputation points they have accumulated so far per pet. This means that a player with 100 reputation points that lost two pets during a showing off phase will lose 20 points of reputation, 1 point times 2 pets times 10 counts of ten.
After losses have been tallied, phase 5 begins.
5. Business
The biggest part of the business phase only begins to take place once a customer arrives. This step is called “selling a pet.” In addition to selling a pet, phase five will have customers discarding assigned need cards and using any leftover imps. Once a customer has arrived, players will be able to sell pets to gain gold.
Customers will buy one pet from each player, as long as that customer approves of the pet. The sale of pets continues in clockwise order from the player holding the starting player token. Pets can only be sold once they are size 4 or larger, meaning that pets will need to have survived a few rounds before they are valid to be sold.
Every customer has preferences, which behave similarly to exhibition scoring rules. On the top of the customer token will be listed the characteristics a customer is looking for, and on the right side of the token will be listed the characteristics they are avoiding. A match score for any pet can be calculated in the same way an exhibition score is calculated.
Note: Customers with poop symbols do not count manure tokens because they are not buying the cage the animal is in. These types of customers only consider the number of poop need cards assigned to the creature.
So long as the match score is greater than zero, a customer will buy the pet. There are two ways to sell the pet, the “Black Market” or the platform.
If you sell on the black market, a pet yields a reputation value of 2 times its match score with the customer. If a pet is sold on the platform, which requires an imp to have been assigned to the platform, the pet will yield a reputation of 3 times its match score.
In addition, regardless of where the pet is sold, gold will be earned equal to the gold value depicted on the pet minus 2 gold if the pet has a mutation token. Keep in mind that a mutation token can cause the gold value of a pet to go into the negatives, resulting in a gold loss from the sale (but a reputation gain!)
After selling, all assigned need cards and potions should be discarded. Potions are discarded back into the potion pile on the central board.
After discarding, the last step of the business phase can be completed. In this step, all imps remaining idle in the burrow are assigned to either clean empty cages or to do odd jobs around town. For each imp cleaning an empty cage, remove two manure tokens. For any imps assigned to do odd jobs, take one gold from the bank.
6. Ageing
In this phase, pets age, food ages, and imps finally return home. On every pet token, the window will display either one or two arrows. This indicates whether the pet will gain one or two more coloured bars during this ageing phase. Pets can only grow to a maximum size of 7. Once the wheel has been turned the number of times indicated, players can move on to ageing food.
During the ageing phase, all food tokens are shifted one square to the right in the food stores. The rightmost food tokens become rotten and must be placed back in the central board. Meat notably rots faster than vegetables, so players should keep this in mind.
Finally, all imps besides imps on the platform and in the hospital should return home, and all minions should be slid back to the 0 spot on the exhibition tracking board. Before starting the next round, the player holding the starting player token passes the token clockwise. This is true for all rounds except for the last round, in which the player with the lowest reputation gets to hold the starting player token.
Endgame and Victory
Once the end of the final round has been reached two special “final scoring” exhibitions will be played out. One of these exhibitions is called the “business acumen” exhibition and the other is known as the “pet display” exhibition. Each final scoring exhibition plays out in a similar fashion to a normal exhibition.
The business acumen exhibition grants points based on artefacts, food stocks, potions in hand, and gold. In addition, penalties are handed out for imps that are not back at home because they are in the hospital, progress board, or on the platform.
The pet display exhibition grants points based on remaining pets, cages, and cage add-ons. Points are removed for mutations, suffering tokens, and manure tokens.
In the end, the player with the most reputation points after the final scoring exhibition rewards are handed out is the winner! In case of a tie, there is a shared victory in order to promote fun and good sportsmanship.