Review
-
Game Rating
Introduction to Dungeon Lords
 “But what about that dark lord? Does anyone ever think about his feelings? Those adventurers, who have never done an honest day’s work in their lives, cannot begin to imagine how much effort goes into building a respectable dungeon.”
– Dungeon Lords Handbook
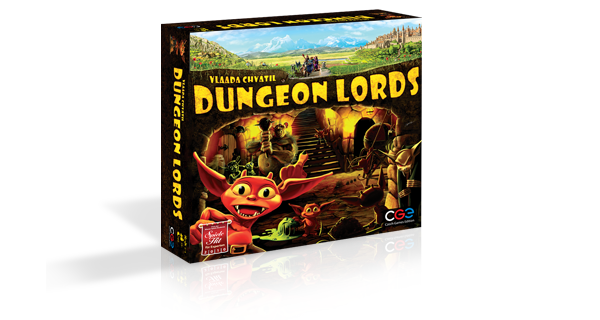
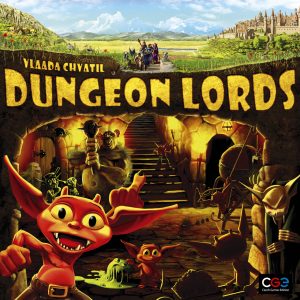
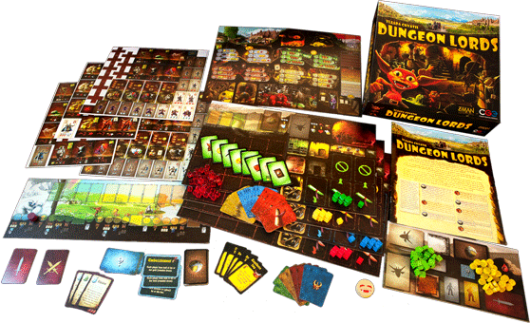
The paragraph above serves as an excellent elevator pitch for the game Dungeon Lords. Published in 2009 by Czech Games Edition and authored by Vlaada Chvátil, Dungeon Lords offers a twist on the RPG tradition of dungeon crawling and monster slaying.
Instead of playing heroic adventurers seeking out glory and fame, the players will undertake the role of dungeon overseers, building and organising the very dungeons that adventurers will later invade. Evilness (in good fun) is encouraged, and while the game is primarily cooperative, there is certainly some competition to be had between the dungeon lords.
Dungeon Lords inspired the spinoff family game known as Dungeon Petz, which explores just how the dungeon lords manage to keep their lairs so well stocked with monsters.
Dungeon Lords offers a healthy balance of combat strategy and economic challenge, having two major phases which engage different player skill-sets.
Players who enjoy both Eurogames and RPGs will likely find Dungeon Lords an enjoyable fusion of the two traditions; while Dungeon Lords draws on the flavour and theming of fantasy RPGs, a large portion of the gameplay is heavily inspired by games such as Settlers of Catan. Players remain in play for the entirety of the game, and the final scoring is based off of achievements as opposed to the elimination of other players.
Dungeon Lords is light-hearted and tongue-in-cheek, riffing dungeon crawler stereotypes and positing an alternate interpretation of fantasy where dungeons are less ominous pits of evil. Instead, dungeon lords are bound to bureaucracy, budget limitations, and food needs.
Players, Playtime, and Components
Dungeon Lords is designed for 2 to four players, and has a playtime of about 90 minutes on average. The game progresses through sixteen rounds, four of building, four of combat, then another four of building and combat each.
The sets of eight rounds are organised into seasons and years. At the end of the 2nd year, the players’ dungeons are scored by the “Ministry of Dungeons” and a winner is declared.
There are a large number of complex components, the descriptions of which are explored below:
1. Dungeon Boards
a. Each player has their own Dungeon Board, which is separated into a number of important sections. The top left of the board contains a lineup that will later be filled with heroes jostling to enter the dungeon. Below this entrance lineup area lies the dungeon construction section. In this section, players will build the blueprint of their dungeon during gameplay.
b. The right side contains considerably more content. At the top of the right side is the combat battleground (whose function will be explored further later) and the monster lair, which contains all monsters (and ghosts.) Below this is the food and gold storage spaces, followed by the “minion office.” Next comes the imp den and the prison. The prison will later contain defeated heroes. Finally come the inaccessible order piles (discard piles for orders) and the trap storage.
c. When playing with less than four players, a Dungeon Board must be flipped for each missing player out of four. On the other side of every Dungeon Board is a “non-player board” which has spaces for orders and minions only. These non-player boards complicate the costs of various resources in order to balance for less than four players.
2. Progress Board
a. The progress board serves two major functions. First off, it displays the “seasons” which classify each of the four rounds of the build phase. Within each season there are four spaces for heroes which will later invade the players’ dungeons.
b. Along the bottom of the Progress Board lies a track of spaces used to organise rounds. As rounds progress, the progress marker will be moved forward and will indicate changes in resources and special events. Events are marked by special event tokens which will be shuffled and placed on the progress board.
3. Distant Lands Board
a. The Distant Lands Board is where decks, discards, and unused cards will be placed. The Distant Lands Board contains the Monster stack, the Room stack, the Adventurer stack, Combat Cards, Damage Counters, and numerous discard spaces. The more complex of these individual components will be explored below.
4. Central Board
a. The Central Board is the largest of all of the components. Starting in the top left and moving to the right and down, the Central board contains a food bank, first year Combat Cards stack, a tunnel tile bank, a gold bank, and a Paladin stack, which should have two tiles (one silver and one gold.) Below the Paladins is the “Evilometer” which keeps track of the evil points each player has accrued. Too much evil, and a Paladin will challenge the player.
b. In the centre of the board are the order spaces. These are jobs you can send your minions to attend to in the town. Each order space has three divisions representing what each order costs (on the left side) and yields (on the right side). Each division indicates in which order a minion arrived. There are different costs and yields for minions third in line or first in line.
c. Along the bottom of the Central Board is the Imp figurine bank, the Trap Cards deck, the “Underground Tavern” and the “Bargain Basement Room Store.” The Underground Tavern is where monsters will be purchased, and the bargain basement is where rooms will be purchased.
5. Monsters, Rooms, and Adventurers
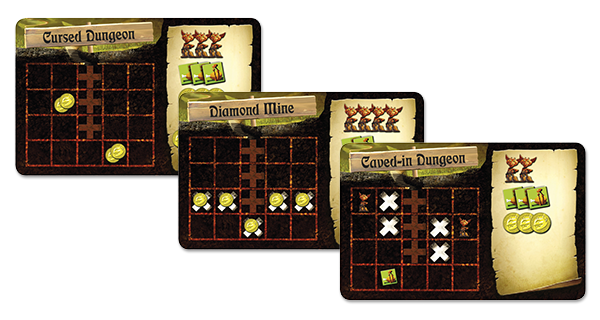
a. Monsters come in many types, and they each have their own unique tile. On their tile their cost is listed in the top right corner and their abilities are listed in the lower centre. Monsters do not have health and after attacking retreat to their lair until the end of the round. Abilities and combat will be explored more below.
b. Rooms are upgrades that can be made to squares in the dungeon. Rooms cost money and come in three types: Production, Combat, and Point-scoring. Production rooms develop more resources for the dungeon lord. Combat rooms offer bonuses to monsters lurking within or detriments to adventurers entering them. Point-scoring rooms can only be built during the second year and provide bonuses specifically to help the player gain an edge in the final scoring phase of the game.
c. Adventurers
i. Adventures come in five varieties:
1. Warriors who always lead the party
2. Thieves who can thwart traps
3. Priests who follow strict healing rules
4. Wizards who can use powerful spells
5. Paladins, who are incredibly powerful heroes mixing the abilities of all other types
ii. Adventurer tiles contain three pieces of information. The “glyph” or difficulty level is listed in the top left corner. The adventurer’s hit points are listed in the top right corner, and finally in the bottom centre is the class designation that determines what variety of adventurer each tile is.
iii. Adventurers also come in two colours, silver (first year adventurers) and gold (second year adventurers.
6. Overview Cards
a. These are reference cards containing useful information for the players. Each player should keep one on hand.
7. Special Event Cards and Item Tokens
a. These should not be used in a standard game, but exist for special variants. For standard play, set these aside.
Now that a basic understanding of each component has been established proper setup can begin.
Setup and Gameplay
Setup is straightforward, but ties into gameplay tightly. For this reason, this guide combines the setup and gameplay segments for clarity. Setup should proceed as follows:
1. Decide Starting Player
a. The nicest player goes first. If no one is very nice at all, determine the starting player by random.
2. Place Boards
a. The Distant Lands board should be set aside in a location that is accessible but will not clutter the main play space.
b. The Progress Board should be placed to the left of the Central Board, which should be within reach of every player.
c. Distribute Dungeon Boards to all players, and flip any Dungeon Boards for empty player slots (i.e. 2 non-player boards for a 2 player game, 1 for a 3 player game and so on)
3. Complete the Central Board
a. Food tokens, Tunnel tiles, Gold tokens, and Imp figures should be placed in their respective banks.
b. Combat Cards for the first year (silver sword icon) should be shuffled, then four drawn face down and placed on the Central Board in the space depicting a town. The remaining five Combat Cards should be placed into the Distant Lands Board without looking at them.
c. All trap cards should be shuffled and placed face down in a deck next to the tavern.
d. Three Troll figurines should be placed in with the Imp figurines.
e. The Evilometer tokens should be placed five spaces up from the bottom of the Evilometer for all players.
4. Complete the Progress Board
a. The Progress token should be placed on the leftmost space on the progress track.
b. Three event tiles should be shuffled, face down, and placed on the large squares marked with “?”
c. Adventurer spaces should remain blank for now
5. Complete the Distant Lands Board
a. Place Monsters and Ghost tiles separately into two shuffled decks. Place the gold tiles down first, then set the silver tiles on top of them, face down.
b. Room tiles should be treated exactly like the Monster tiles.
c. Adventurer tiles should be shuffled separately by colour and placed separately unlike the room and monster tiles which are stacked together.
d. Second Year Combat Cards should be shuffled and placed here.
e. All damage counters should be piled on the board
6. Distribute Starting Goods
a. Player should place three tunnel tiles in the top three squares of their dungeon, in the central column. Three minion, imp, food, and gold tokens should be placed in their respective spaces on the Player Board.
b. Players should be given their 8 order cards, which should be shuffled. Each player should draw two cards and place them face-up in the “inaccessible orders” spaces on the Player Board. All other orders go into the players hand for use later in the round.
Once good have been distributed, gameplay can begin. Each round has a miniature setup phase that takes place before turns begin. During the “New Round Phase” the following steps must be taken:
1. Restock the Stores
a. Three Monster tiles should be drawn from the Monster stack on the Distant Lands Board and placed face up in the Underground Tavern.
b. Two Room tiles should be drawn from the Room stack and place phase up in the Bargain Basement Room Store.
c. All leftovers from previous rounds are discarded before new Rooms and Monsters are added.
2. Reveal the Next Round’s Event and Adventurers
a. Note: This step is skipped in the Fall season as there will be no new events or adventurers until after the combat rounds.
b. The Event for the end of the following round should be revealed. This gives players time to prepare for the events before they occur.
c. Four Adventurer tiles should be drawn and placed in order of drawing on the next round’s adventurer spaces. The Adventurer tiles should then be rearranged by complexity of glyph. The more lines the glyph has, the more difficult the Adventurer. Weak adventurers should be placed leftmost. Matching glyphs should remain in the order they were drawn. If all glyphs match, a new adventurer should be drawn, and the most recently drawn Adventurer should be placed at the bottom. Repeat this step if necessary until at least one glyph does not match the others.
Once the New Round Phase has been completed, the rounds proper can begin. Round progress as follows:
1. Orders Phase
a. All players should begin with 6 Order cards in their hands and two inaccessible orders placed on the board. Each player simultaneously chooses three orders from their hand and places them face down on the three empty order spaces on their Dungeon Boards in left to right order.
b. Once all players have made their choices and organised their orders, all players reveal their first order card simultaneously. Orders are carried out clockwise from the starting player by placing a minion token on the queue next to the location in town matching the selected order. After all players have carried out their first order, all second orders are revealed and carried out similarly.
c. Order cards contain an icon referencing one of the locations on the Central Board. As described above, each location has three spaces in queue. If a player has a minion in queue already and another player chooses an order with the matching icon afterwards, the minion who arrives second must take the second place in the queue. If all three spaces in queue are occupied and more minions arrive, minions after the third are turned away and cannot complete an order for this turn.
d. Once all three minions have been sent to their location, the orders themselves can be resolved. Orders resolve by queue from the upper leftmost location down to the lower rightmost. In all locations except for the Underground Tavern and the Bargain Basement, orders are carried out starting with the first in the queue. Certain spots in queue may have greater benefits, or may have costs. If there are symbols on the left side followed by an arrow icon, that indicates that the order has a cost. Players do not have to pay the cost and can simply occupy the space if they so desire, but, of course, they will not receive the space’s benefit.
e. Spaces can have three types of costs in the form of gold, food, and evil points. Evil points generally indicate extortion or thievery which builds infamy for the player’s dungeon lord. The possible orders are described in full below.
i. Get Food
1. Depending on position in line, a minion can either pay gold or take evil points in order to attain food from the villagers.
ii. Improve Reputation
1. Each space here does something different. For each smile icon indicated, a player lowers their icon on the Evilometer by one space. Improving reputation can therefore ward off dangerous paladins. Additionally, two spots in line allow the player to “spy” which means that they are allowed to secretly look at one of the four combat cards that have been placed on the Central Board in preparation for the First Year’s combat.
iii. Dig Tunnels
1. Dig the indicated number of tunnels with the indicated number of imps. Note that the third space allows for the digging of four tunnels, but requires one imp to be a supervisor, raising the imp cost to five.
2. Tunnels must be placed adjacent to one another, connecting by at least one path. Tunnels cannot be arranged such that there is a solid block of tunnels all interconnected. Because of this, be careful with placing tunnels diagonal to one another.
3. A player may use less than the indicated number of imps to dig less tunnels.
iv. Mine Gold
1. Gain the number of indicated gold with the indicated number of imps. This behaves much like digging tunnels, including the final space requiring a supervisor imp who does not dig gold themselves.
2. Each imp must dig gold in an unoccupied, unconquered tunnel (more on conquering below), and two imps cannot dig in the same tunnel. As a result of this, there are two resources required to mine gold – imps, and tunnel spaces.
v. Recruit Imps
1. At the cost of food and/or gold, players can get additional imps. New imps cannot be used for orders in this specific phase, but they can participate in the Production Phase, later in the round.
vi. Buy Traps
1. Pay gold to gain new traps. Note that the second imp to arrive gets a free trap.
vii. Hire a Monster (or Ghost)
1. Monster hiring progresses in backwards order, with the last arriving imps going first. When buying a new monster, the player must pay the price of the monster as indicated on the corner of the Monster tile.
2. Players may only buy one monster, and the first arriving imp has an additional food cost to pay!
viii. Buy and Build a Room
1. Once again, Room purchasing progresses in reverse order of the other orders. On every new room tile is a small diagram of where the Room is allowed to be placed, and all Rooms must be placed over an unconquered tunnel tile. Rooms cannot be adjacent to one another. If there are no valid spaces for a Room, that Room cannot be purchased.
2. Note: Rooms are not valid locations for gold mining, so players should be aware of this possible downside.
f. Once all actions have been processed, the Orders Phase ends. Minions who carried out orders return to the minion offices. Minions who were unable to complete an order remain placed aside on top of their Order card.
2. Production and Orders Retrieval Phase
a. During this phase, all Rooms that indicate that they are Production Rooms will generate their resource. Some rooms indicate an imp cost, and will require imps that did not previously mine or dig this round. Trolls can also work Rooms in the place of imps (though they cannot mine or dig.)
b. During the First Year, all Rooms can only be used once.
c. After room production has been sorted, Orders should be retrieved. Players pick up the inaccessible Orders cards as well as the first Order card they played. The other two Order cards should be slid up into the inaccessible Orders spaces. Orders that were not carried out and have a minion token waiting on them can be retrieved instead of the first Order, if the player so desires.
3. Event Phase
a. Note: There is no Event Phase in the first round of each Year (winter)
b. There are three types of events which will occur in a randomized order.
i. Pay Day
1. Every player must pay the listed cost of each Monster, which can be in the form of gold, food, or evil points. If a player cannot pay or refuses to, the Monster is discarded, and the player gains one evil point.
ii. Taxes
1. This event demands a tax based on dungeon size. Players must pay one gold for every two dungeon tiles (both tunnels and Rooms).
2. Unpaid taxes earn a player a Damage Counter, which is to be placed in the “Dead Letter Office” space on the Dungeon Board of the player. Each Damage Counter will dock the player 3 points at the end of the game.
iii. Special Event
1. There is a deck of varied events. These events usually have special rules described on the event card. Only one of these will appear per Year. Taxes and Pay are certainties, whereas Special Events are variables.
4. Adventurers Phase
a. During this phase, every player is assigned one of the current season’s Adventurers. The player lowest on the Evilometer receives the leftmost (weakest) Adventurer. This continues, with each further evil player receiving a more difficult Adventurer. Ties are resolved by play order, so the player who goes first in play order would receive the easier Adventurer.
b. Adventurers are arranged from right to left on the squares above each player’s dungeon. The only exception to this is a Warrior. Warriors will bump all previous Adventurers one square left and take the first square for themselves (including previously assigned Warriors!)
5. End of Round
a. At the end of each round, the starting player should pass the “starting player token” to their left, making a new starting player for the following round. The only round this does not occur in is the final season, Fall.
b. All imps should be returned to their den.
c. Check the Evilometer. If any player reached the final space indicating the Paladin at any point during the round, the Paladin will challenge them during the following combat rounds.
Combat:
When the seasons are all complete, each dungeon will have three adventurers waiting outside (unless that dungeon attracted the Paladin!) To prepare for combat, flip the Progress Board to the Combat Side and lay out the First Year Combat Cards in order. The top combat card will be in the leftmost position, and so on. There will be four Combat rounds, and each one contains the following phases:
1. Planning Phase
a. For the first round, the Adventurers will always invade the first tunnel from the entrance. In the following three rounds, the players will control which tunnels will be invaded, based on nearness to the entrance. Players must choose from the next nearest tunnel or Room, meaning there may be as few options as one tunnel or as many as three. Additionally, this means Adventurers sometimes “backtrack” to attack a room that is closer to the entrance, but perhaps further from the previous square they invaded. Essentially, a line should be drawn from the entrance to the nearest room each round of combat.
2. Choose Defence
a. After picking a tile, players must then decide which Monsters and Traps to call upon. Some traps do have costs, and this should be paid attention to closely. Players can opt to choose no defences, though this is rarely advised.
b. Tunnels are limited to one Trap and one Monster per tunnel square. Rooms can house two Monsters, but only one Trap, and Traps placed in Rooms cost one gold.
3. Combat Card Phase
a. After the preparations have been made for the current round, the Combat Card should be revealed. It does not yet take effect.
4. Battle Phase
a. All battles progress in standard player order. It is important to keep an eye on the Evilometer, because certain effects can cause a change in the Evilometer. If the Evilometer changes and a new player has the highest evil, the Paladin should be moved immediately to the newest most evil dungeon. The Paladin takes with him all current damage tokens, and if he is defeated in any dungeon, he will no longer invade any other dungeons and will be placed in the prison of the dungeon lord who defeated him.
b. Battles begin by revealing any active Trap cards and paying their cost immediately. Most Traps deal damage, but the Thief and Paladin cards can reduce this damage depending on the number of Trap icons on their tile. Traps are discarded to the Distant Lands Board once used.
c. Following Trap activation, the Adventurers will use their Fast Spells if and only if the Combat card for the round has the lightning-and-gem icon. The party must have enough magic points which are indicated on the Adventurer cards. Spells have many effects which are explained on the Combat cards.
d. Next comes the Monsters step. Players may choose which order the Monsters act in if more than one Monster was sent into battle. Additionally, players may choose which attack to use if a Monster has more than one type of attack listed. A full glossary of attack icons is available in the handbook, but a basic list is above in the components segment. Once a Monster attacks, it is knocked out until the end of the Combat section of play (the end of the Year,) and must rest in its lair.
e. After the Monsters step comes the Slow Spells step. This step functions exactly like Fast Spells, except with a different icon and occurs after Monster attacks instead of before.
f. The Healing Step comes next. If the party has a Priest or Paladin present and has been attacked this round, one damage counter is removed for each heart symbol listed in the party. Damage counters come off Adventurers in the front of the party first. Of course, no healing can be done to Adventurers who have received enough damage to supersede their listed health. These Adventurers are considered defeated and will be placed into the dungeon’s prison space.
g. The Conquering and Fatigue step occurs next. Fatigue is damage accrued due to the effort demanded by exploring the dungeon. The Combat card for each round will determine how much Fatigue damage is dealt. Fatigue damage is meted out one point at a time, accruing on the first Adventurer in order before moving on to the others. Damage only passes on to the next Adventurer in order if the Adventurer in front of them is defeated. If any Adventurers remain after Fatigue damage is dealt, the current room is considered to be “Conquered.” A Conquered tile is a dead tile, no one can use it and it must be flipped to its lighter side. Conquered tiles cannot be upgraded or mined, and they still count towards building restrictions and taxes. Conquering a room lowers that dungeon’s Evilometer score by one (barely a comfort.)
5. Combat End
a. If and when all Adventurers are defeated, Combat ends for that dungeon and no further rounds of combat must be played. This is the ideal outcome. There are two further ways for Combat to end. Combat can passively after four rounds, at which point the Adventurers leave to the Distant Lands Board, or it can end in terrible Conquering. If every tile is Conquered in a dungeon, the Adventurers have nowhere left to invade and instead will free one prisoner per combat round.
b. Note: If a player has eliminated all Adventurers, but finds themselves at the top of the Evilometer, it is possible that the Paladin will come to invade. This player will be pulled back into combat in such a case.
Second Year:
The Second Year progresses much like the First Year, with a few modifications. First, a new starting player should be determined by passing the token to the player opposite the very first starting player of the game.
If any player is at or above the Paladin marker on the Evilometer, the new Second Year Paladin will wait outside the door of their dungeon. Second Year Room tiles are much different. Instead of producing, they aid the player either in Combat or in Victory points. Additionally, Trap purchasing is slightly different in the Second Year.
When buying Traps in the Second Year, players will draw two Traps and choose from those Two. Additionally, they can choose to discard one of the Traps in their possession currently in exchange for the ability to take both Traps they drew. Combat in the Second Year is exactly the same.
Victory
On the Combat side of the Progress Board is the “Scoring Track.” This is used after the Second Year Combat to determine a winner. Players are recommended to use a minion to indicate their position on the scoring track. Victory scoring proceeds as follows:
1. Two points for each Unconquered Room in a dungeon.
2. One point for each Monster in the Monster Lair (Ghosts do not generate victory points.)
3. Two points for each Adventurer in a dungeon’s prison, but five points for a Paladin.
4. Minus two points for each Conquered tile.
5. Minus three points for any damage token.
6. Points for any bonus room (except the Hall of Fame.)
After standard points have been tallied, Titles will be doled out which provide bonus points. Titles provide three points to a sole victor, and two points to each shared victor.
1. Lord of Dark Deeds
a. The player highest on the Evilometer receives this title.
2. Lord of Halls
a. The player with the most total Rooms (even Conquered Rooms) receives this title.
3. The Tunnellord
a. The player with the most tunnels (even Conquered tunnels) receives this title.
4. The Monsterlord
a. The player with the most Monsters receives this title. Ghosts do not count!
5. The Lord of Imps
a. The player with the most imps receives this title. Trolls do not count!
6. The Lord of Riches
a. The player who has the greatest total of unplayed Traps, gold, and food receives this title.
7. The Battlelord
a. The player with the least Conquered Rooms wins this title.
The player with the most points becomes the “Underlord”, the most terrifying and highest ranking dungeon lord in all the land. Any player above zero passes the Ministry test and becomes a certified dungeon lord!
Unfortunately, any player below zero points will fail and must try again in order to become a bona fide dungeon lord!